Notice of Objection Submission Help
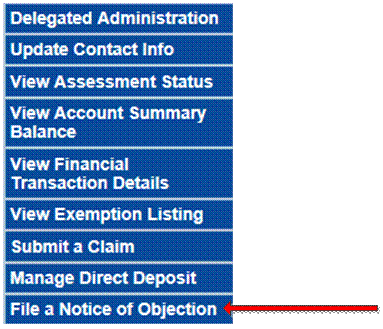
Select File a Notice of Objection from the
menu on the left side of the screen. The
option to File a Notice of Objection will only be
available if you are an Account Owner or an Account Representative who has been
granted access by the Account Owner to file a notice of objection.
Filing a Notice of
Objection
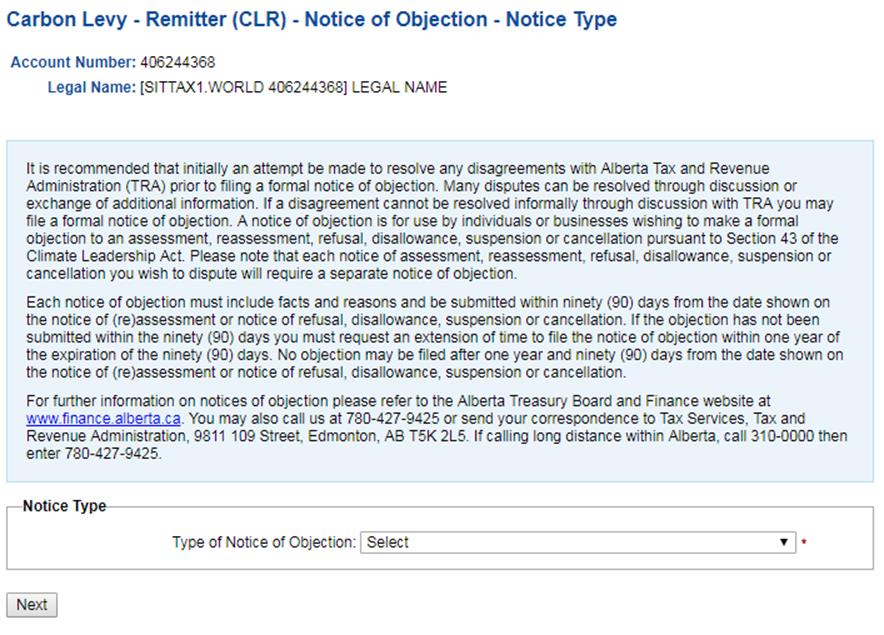
1)
Notice Type: To begin
filing a notice of objection, the first step is to determine the Type of Notice of Objection. There are
two types of objections: Notice of (Re)Assessment or
Notice of Refusal, Disallowance, Suspension, or Cancellation. If you are filing
an objection to a Notice of (Re)Assessment, you will
need to select the Taxation or Grant
Period, Date of Notice, and
enter the Tax/Levy Amount in Dispute.
If you are filing an objection to a Notice of Refusal, Disallowance,
Suspension, or Cancellation you will need to enter the Date of Letter. You cannot have a Date of Notice or Date of
Letter greater than one year and 90 days.
Once you have entered the information associated
with the type of Notice, please click on the Next button.
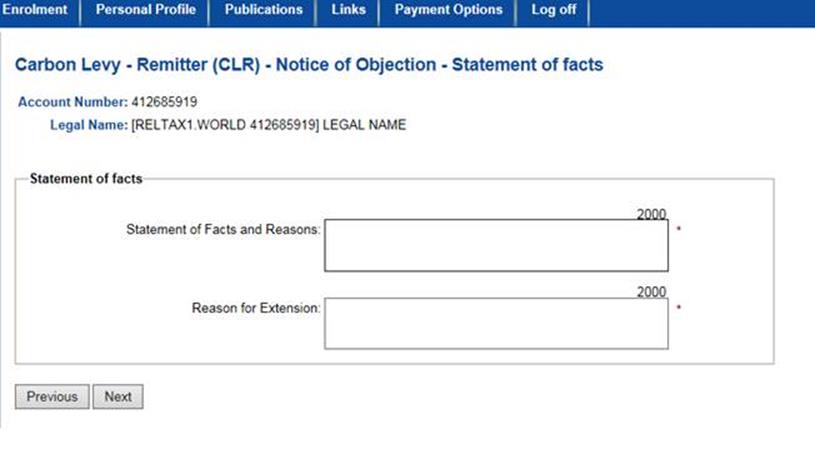
2)
Statement of Facts: In this section
you will need to enter the Statement of Facts or Reasons concerning your
objection as well as the Reason for Extension. The maximum limit for the
Statement of Facts or Reasons and Reason for Extension is 2000 characters. It
is mandatory that you complete this section.
Once you have entered the information, please click
on the Next button.
3)
Select Document: You will
need to add any documents that support your objection here. There is a limit of
10 files. A description must be supplied with each document submitted.
Once you have entered the information
associated with the select documents, please click on the Next button.

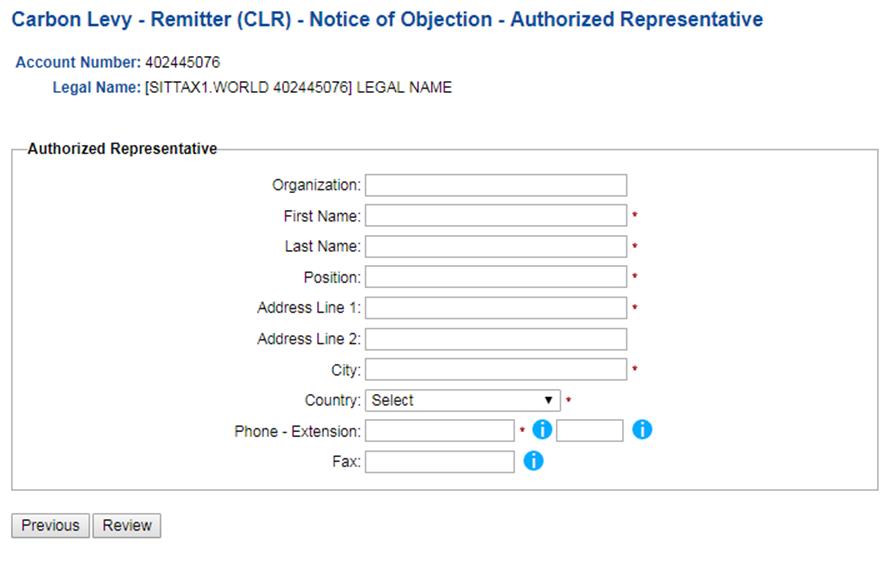
4)
Authorized
Representative: Information must be supplied on the
Authorized Representative that is filing the notice of objection. First Name, Last Name, Position, Address Line 1, City, Country, and Phone are mandatory fields. Once a Country is selected, you will be asked
to provide the Province/State and Postal / Zip Code location of the
Authorized Representative.
Once you have entered the information on the
authorized representative, please click on the Review button.
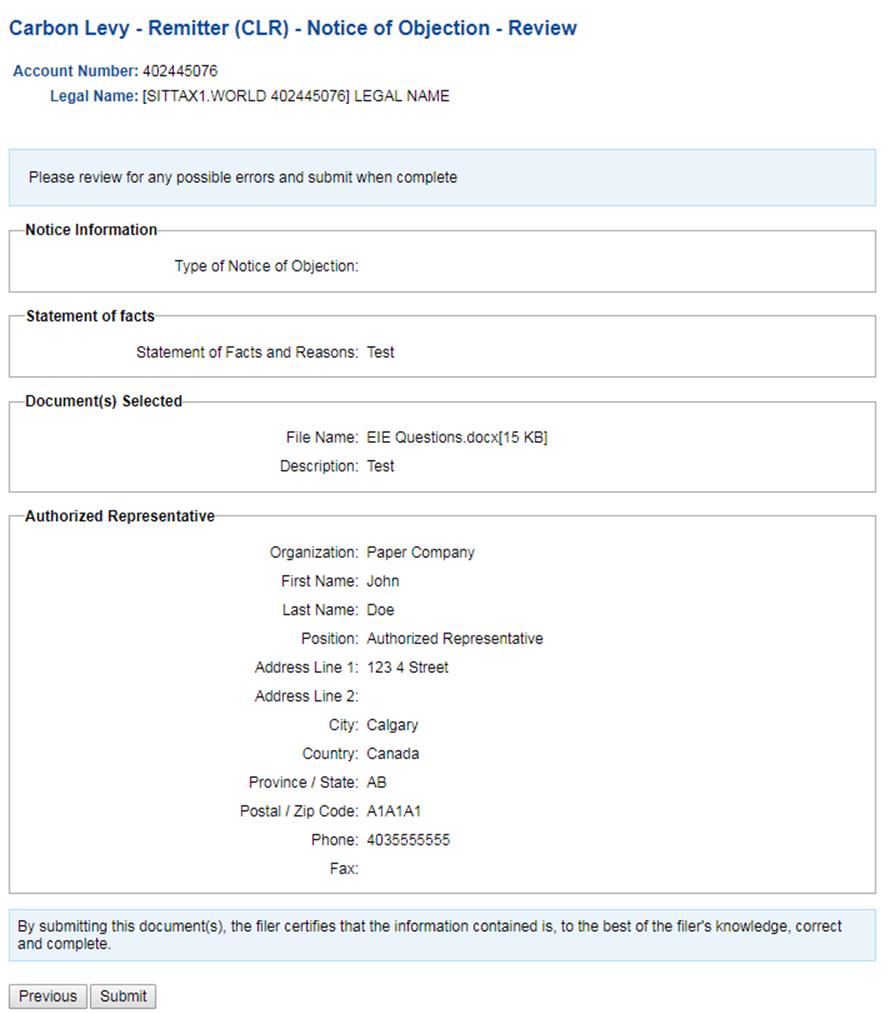
5)
Review: In this
section you can review all of the information you have supplied. If you feel
you have made a mistake, you can click on the Previous
button.
Once you are satisfied on the data you supplied
with your objection, please click on the Submit button.
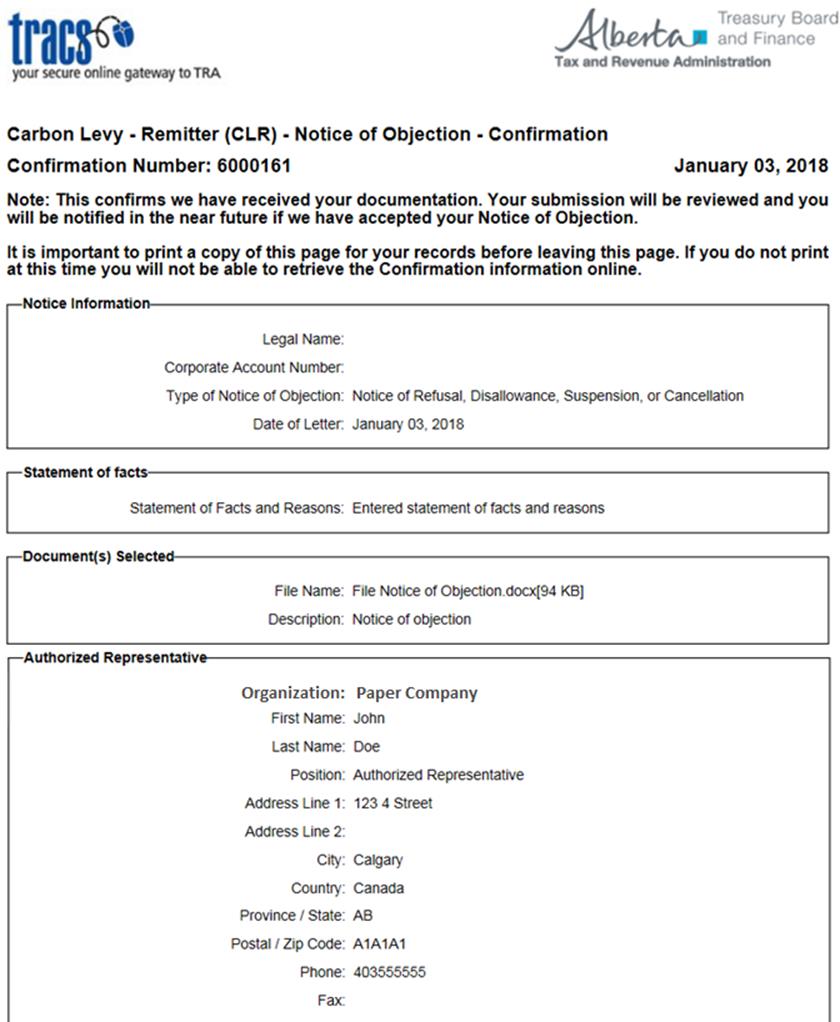
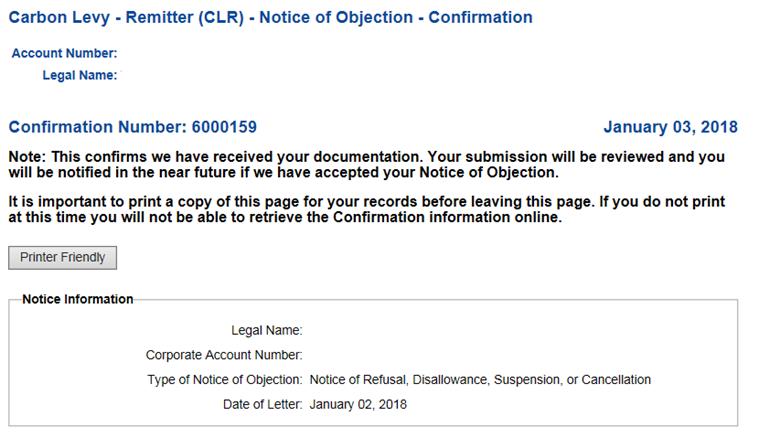
6)
Confirmation: This is
the confirmation page with a Confirmation number. An email will be sent to the
Account Owner and all Account Representatives with the File a Notice of
Objection functionality indicating that a notice of objection has been filed
for this account. In order to receive an email, you must sign up for email
notifications under the Personal Profile Page. The confirmation only confirms
that your notice of objection has been filed. It does not mean that our
objection has been accepted.
7)
Printer Friendly: This
section allows you to print for your own records the information supplied on
your notice of objection.